Are you in trouble connecting the TP-Link AC600 WiFi adapter to Kali Linux?
After reading this your problem will be solved. I know you are curious to learn about hacking or you have been buying that product for just wifi connectivity and fast internet. But if you have bought this for hacking and to connect with Kali Linux this article is gonna help you.
Why do we need wifi adapter even it is already available on our computer or laptop?
The normal built-in wifi adapter on your computer or laptop can not be accessed by the virtual box and if you install the Kali Linux or other operating-system other than Windows, as your main operating system it may not work properly for penetration and hacking.
Because it has some limitations and it is just used for wireless connectivity and sometimes it does not support the penetration and other functionality, if it supports then it will not effective for all tasks.
The big reason is that its coverage is not larger than external wifi adapters like TP-Link and others. Also, the internet speed (up to 200Mbps) works best in external wifi adapters.
See also:- What is an API? with Example Program
Why TP-Link wifi adapter is not working on Kali Linux or virtual box?
The reason is that this wifi adapter only works when its driver exists on the operating system where it is gonna used. Windows operating system has already installed the drivers so it works the first time you connect it. But when you connect it to Kali Linux or in a virtual box it doesn't support the OS.
It is because it has not pre-installed the drivers for the wifi adapter. So we have to install the useful driver into your Kali Linux or virtual machine.
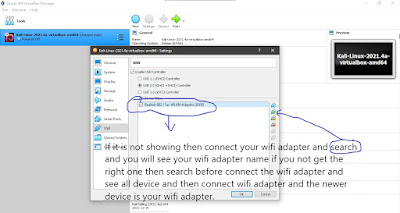
Before installing drivers make sure that the wifi adapter is connected with your virtual box As shown in the image below.
How to install drivers for the TP-Link AC600 WiFi adapter?
First, don't connect the external wifi adapter, and make sure that you are connected to the internet.
Step 1: Open your Virtual Box and start the Kali Linux OS, and then login as a root.
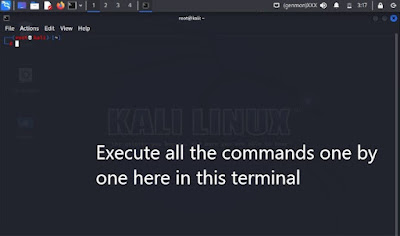
Step 2: Open the terminal.
Step 3: Execute these commands one by one and wait until it complete.
1. sudo apt update
2. sudo apt upgrade
After command execution restarts your computer or the Virtual machine. If you would not restart your computer the installation would not work.
Step 4: Install dkms and git by executing this command >> sudo apt install dkms git
Step 5: Install Build Dependencies by executing this command >> sudo apt install build-essential libelf-dev linux-headers-$(uname -r)
Step 6: Download the driver files using git by executing this command >> git clone https://github.com/aircrack-ng/rtl8812au.git
Step 7: Navigate to the download directory by executing this command >> cd rtl8812au
Step 8: Install the driver by executing this command >> sudo make dkms_install
Congratulation you have done. All set now you can connect your wireless adapter to the Kali Linux and check if it is working or not by iwconfig or ifconfig commands.
Conclusion:-
All the steps I have mentioned in this article are working and personally applied by me because I also suffer from the same problem and after research, I found this solution.
If you like this article please support me and share this with your friends and family.
You can support me with little money. My payment UPI id is 8839898858@paytm or you can bank transfer Ac. no. 919993153038 IFSC PYTM0123456 Name Aditya Narayan Soni
Thanks For reading the full article


No comments